Sony WH-ULT900N (ULT Wear) FCC Teardown
The internal documents for the WH-ULT900N are now available but a full teardown from 52Audio will provide more details, so I will have a future post once they post that up. The quality of the photos will be less than optimal, so prepare for potato quality.
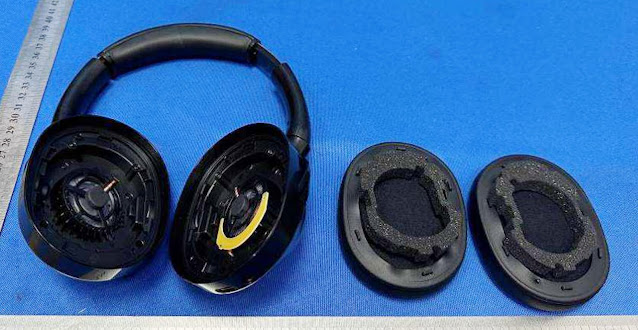
With the earpads removed, we have 2 new parts in the new model. First, on the left, we can see the capacitive wear detection sensor, and on the right, extra foam which is under the earpad cushions. The earpads are attached using clips like previously.
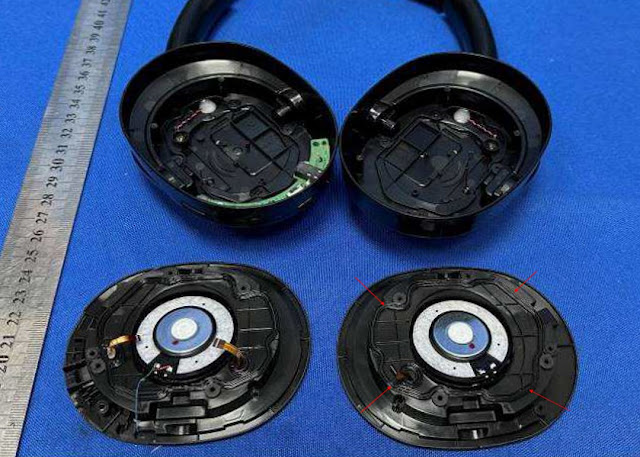
Removing the drivers and their plastic holder, there is no cover on the back of the driver like in the WH-XB910N. While the photo is rather poor, there does appear to be some kind of seal/membrane/lip sealing the drivers, see the red arrows bottom right.
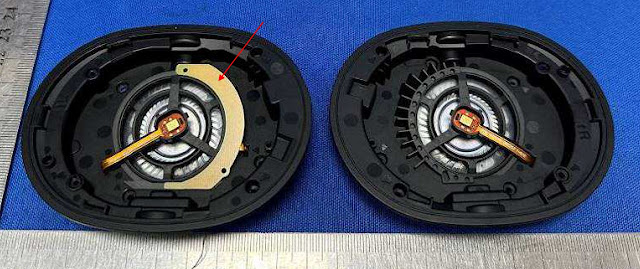
Here is a closeup of the drivers and the wear detection (red arrow). The capacitive sensor only surrounds half of the driver, where as in the WH-1000XM5, the sensor encircles the entire driver. I wonder if we will see a change like this in a future WH-1000XM6. For the new model, Sony has switched to a ribbon cable for the connection to the MEMS feedback NC microphone (like WH-1000XM5). The previous model also used a MEMS microphone and was covered by a rubber cover, no doubt removed here for the certification.
A close up of the sensor. I would think such a sensor could easily be added to Sony's mid and low range headsets. Would add a great selling point, automatic pause and play.
The feedforward microphone is probably under the red arrows, but whether it is a MEMS or electret type is unknown. My guess is we might see an electret type again but perhaps Sony has changed it to MEMS. There is some kind of glue covering the mic or perhaps the hole for the cable, hard to tell with these photos. Similar glue coverings were present in the WH-XB910N, but not for the feedforward NC mic, that was held in place with a plastic cover and screws.
The yellow arrows point to a plastic rim which seems to correspond with the rubber/lip membrane on the back of the driver piece to create a seal to keep dust out.
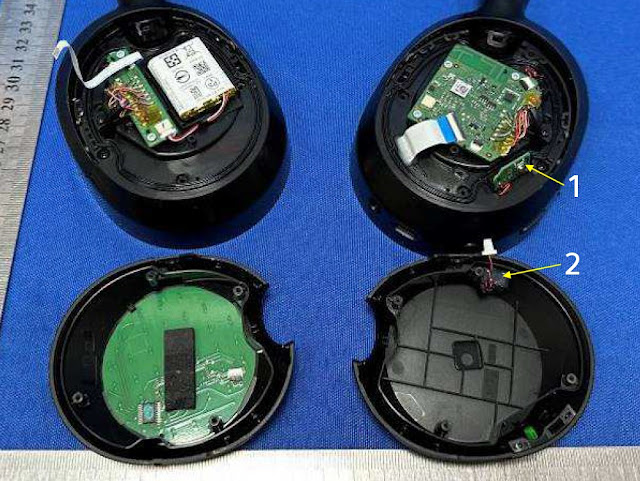
Here is the accessory PCB with the USB type-C port, the 3.5mm port, the On/Off button (1), and the NC/AMB button (2). On the reverse side is a ribbon cable connector which connects the accessory board to the main PCB, and 2 soldered wires which are connected to the ULT button, removed in this photo. When compared to the old mode, the accessory board in the WH-ULT900N is a smaller and less wide.
 |
| Right earcup on the left, and Left earcup on the right |
Removing the earcup covers reveals the main PCB and the battery. On the reverse side of the cups, we have the touch sensor (left) and the voice microphone (2). The photo is too poor to determine what kind of mic this is. The ULT button PCB (1) is visible in this photo.
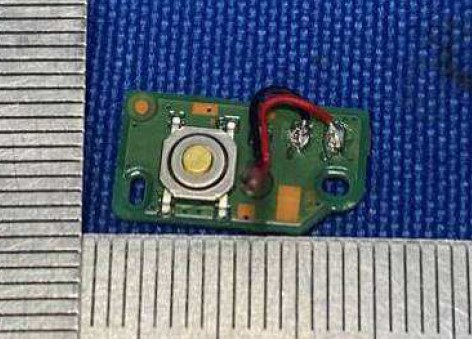
A close up shot of the ULT button and its PCB.
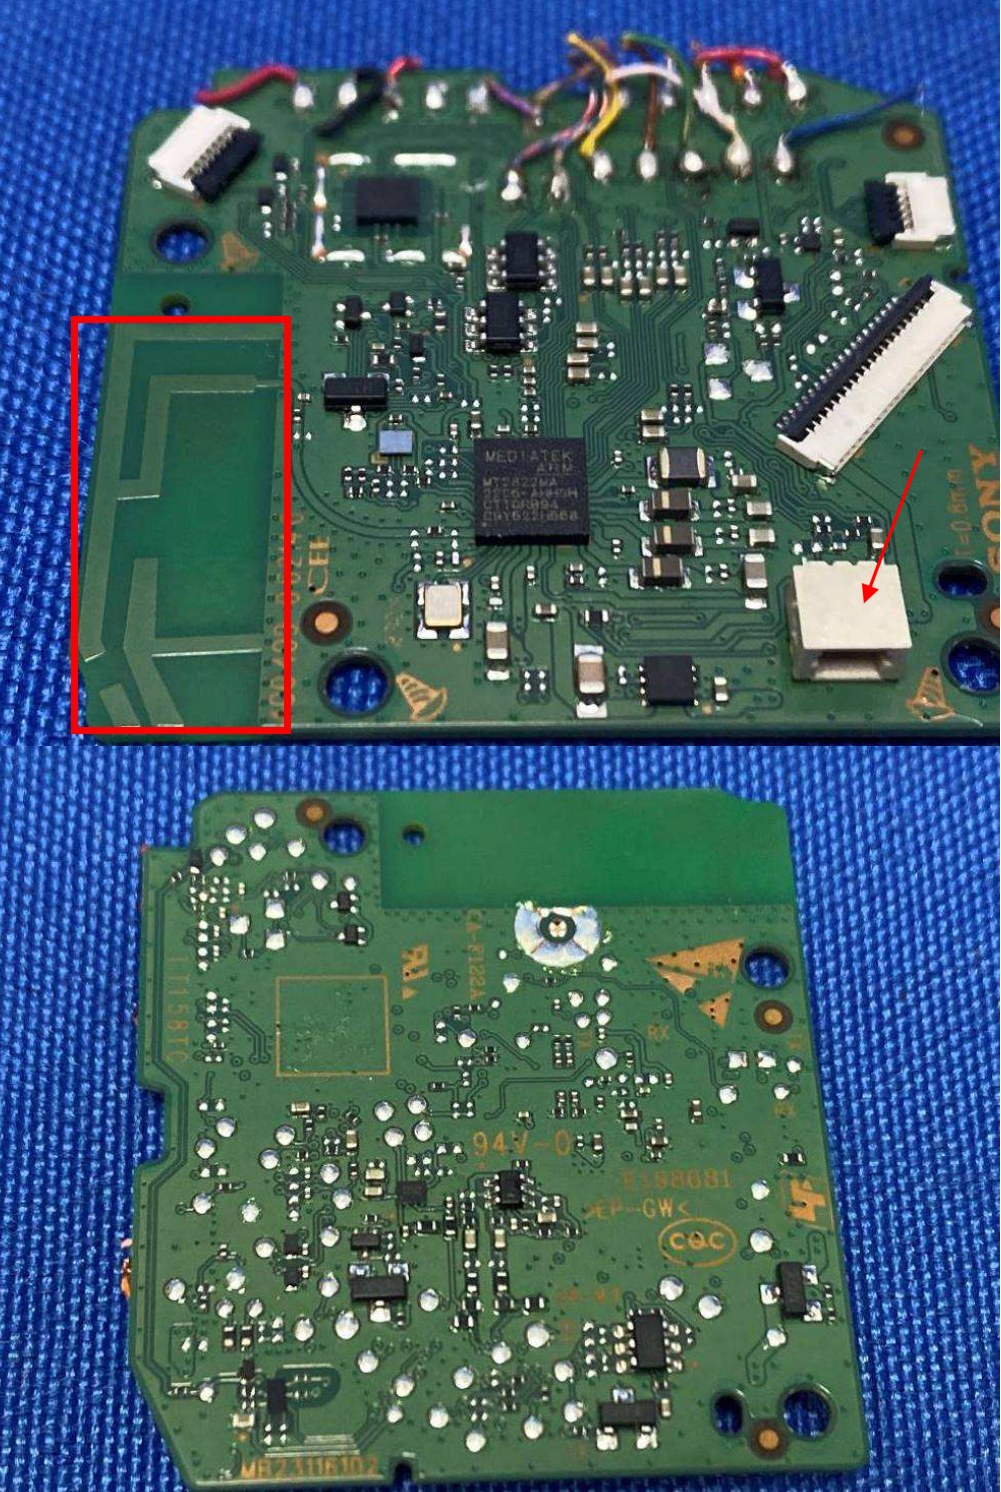
There is a second accessory board beside the battery, which has 2 ribbon cable connectors, one for the feedback NC mic (top right) and the other for the touch panel (bottom right). The connector on the left side of the PCB is for the battery. The rest of the soldered connections are for the feedforward NC mic on the same side and the rest go to the main PCB to the other side via the headband. I was going to analyze what the connections are but I will wait for the full teardown for clearer photos.
The battery is from Springpower, the same supplier as the WF-1000XM4 and WF-1000XM5 coil cell batteries. The model is 702428, identical to the one found in the WH-XB910N.
The battery is 520mAh rated at 3.85V, with the same capacity as the WH-XB910N. I am confident that Sony just reused the same battery for the new model. A larger battery could fit, even if it was 600 or 700mah, but it would probably have superior battery life to the WH-1000XM5. So this is probably why Sony kept the battery the sane, as not to outshine the flagship model.
And with that, this concludes the FCC teardown analysis. Definitely some differences to the old model but some things the same like the battery. I will wait for a full teardown for a more direct photo comparison.
If anyone notices anything interesting in the photos, leave a comment below.






Can you publish a video of the teardown? It would be a great reference just in case I have to replace the battery in the future.
ReplyDeleteThis is from a FCC pdf file, I don't own the headset. So no video. If people wish to donate for me to buy a unit and tear it down, then can always donate on my buymeacoffee page
Deletehttps://buymeacoffee.com/thewalkmanblog